


Disclaimer: What you’re about to read is a true grit, expert comparison of two Thule products – the T2 and the T2 Pro. What makes this comparison unique is that I worked for Thule for eight years as one of their design engineers, so I have a little more insight on their products than most folks. Furthermore, in the past twenty years, I have sold, installed, and maintained products from every after-market car rack manufacturer available in North America. It’s like my thing. Some might even say it’s my calling.
I no longer work for Thule, but I wanted to make it crystal clear that everything I am sharing is public knowledge. It’s not my intention to divulge secrets or pick sides here. My goal is to provide you an expert comparison between two products by talking about the difference between the two racks.
So – No. I cannot get you a pro deal. But yes, you can call me if you have any technical questions.
Thule T2 and T2 Pro: An Unbiased and Educated Comparison
The following is going to be formatted so that there’s a considerable amount of technical, comparative information broken up into segments for better digestion. There will be a recap of the upgrades found on the T2 Pro at the end – so if you want to just cut to the chase and scroll there now; feel free to do so. But, reader be warned, there is a lot of useful information woven throughout that won’t be covered in the recap.
HISTORY
When Thule launched the original T2, more than ten years ago, they brought an under-developed rack segment to the mainstream: the platform rack hitch bike carrier. This style of rack system allowed for a variety of bike styles to be transported on a singular system – something hanging style hitch racks still can’t do. Because it was rugged, easy to use, and eliminated frame contact, the T2 quickly became accepted by all types of cyclists. Although, I think it’s safe to say that it reached cult status with the mountain bike and downhill crowd as it provided an easy way to safely and securely transport their heavier, wacky, hybrid framed bikes.
Over the years, there have been a few improvements made to the original T2, the most notable being the lengthening of the ratcheting arm to accommodate 29ers and the inclusion of a cable lock to further improve security. A couple of years ago, Thule introduced their 919 Fat Tire Kit add-on which allowed for the use of fat tire bikes on the T2. But other than these few improvements and accommodations, the T2 has gone relatively unchanged for a decade.
WHY CHANGE A CLASSIC?
Since the launch of the original T2, there have been a lot of changes in automobiles, bikes, we as people, and even in Thule itself. For one, when the original T2 hit the market, 29er’s were a rare breed of bike and the fat bike was an incredibly small nice that was still developing. In regard to Thule, not only had they begun to make their products look more modern and premium, but they had also made them easier to assemble and use too. The exception to that was the original T2, which requires a considerable amount of assembly out of the box and can be a bear to install into your hitch. For a society of fast-paced people, it was becoming a little long in the tooth which started to impact people’s opinions about the rack itself.
Additionally, in the past few years fat bikes have become a major “thing”. They are more popular than anyone could have anticipated and the bike industry is embracing that fact and designing more and more options to as a result. Based on their weight and size, the original T2 has been a natural choice for fat bike owners who were initially forced to modify the rack or deflate their front tire to use it properly. That is, until Thule brought the 919 Fat Tire Kit to market. Though the 919 was a hit and served its purpose, customers felt that this feature should be built into the rack itself and not as an add-on. After all they’d already paid a considerable amount of money for their bikes; why should they have to pay more to carry it around as well?
All of those variables considered, the timing really couldn’t have been better for Thule to hit the market with a premium version of the original T2, which is aptly named the “T2 Pro”.
FORM AND FUNCTION
When you look at the structure of the original T2 and T2 Pro, they’re comprised of the same components: steel stinger, aluminum tube bike trays, ratcheting arms, front wheel holders, and rear wheel holders. Mechanically, both racks generally function the same way and physically both racks hold your bikes the same manner. It’s not until you insert the T2 Pro into your receiver hitch and start assembling it that you begin to really get a feeling of what makes the Pro a more premium option, other than just looking more modern and unique.
The original T2 was comprised of a hitch and backbone assembly, spar hanger, 2 spars, 2 ratcheting arms, 2 front wheel holders, and 2 rear wheel holders, as well as a bunch of hardware. Without fail, no matter your skill level, you could assume it would take at least an hour to get the original T2 installed and assembled on your vehicle. Furthermore, some folks claimed they could never get the bolts for the spar hanger to tighten well enough to keep the spar tubes, which the bikes were mounted on, from moving down the backbone assembly. This type of construction allowed the user to adjust the spacing between the front and back bikes, but it left room for user error and could complicate the assembly process or even cause the bikes to come off the assembly altogether.
With the T2 Pro, Thule eliminated the spar hanger all together, opting for two fixed, welded plates built into the main stinger assembly (formerly “hitch and backbone assembly”) that you mount the bike trays (formerly “spar tubes”) and ratchet arm assemblies on. Not only does this minimize human error, but it also cuts down on the overall assembly time dramatically.
Another feature integrated into the T2 Pro to make life easier is the tool-free “AutoAttach” system, which is a carry-over from Thule’s Helium and Apex lines of hitch racks. The “AutoAttach” system is designed so the user simply has to insert the stinger into their receiver hitch, use the hook to locate their hitch pin hole, tighten the stinger knob, and lock it. Viola – no tools needed!
All in all, the assembly time on the T2 Pro should take about fifteen minutes using the included tools. When it comes time to reinstall the rack back into your hitch receiver and tighten it down, the whole process should take less than a minute.
THE DIMENSIONS
For more than twenty years, hatchbacks and SUV’s have ruled the road here in North America. Over time they’ve become more stylish and some have even begun to shrink in size to be more modern and efficient. Because of these things, clearance between the rack and rear hatch as well as clearance between the rack and the ground have become important factors when using hitch racks in general.
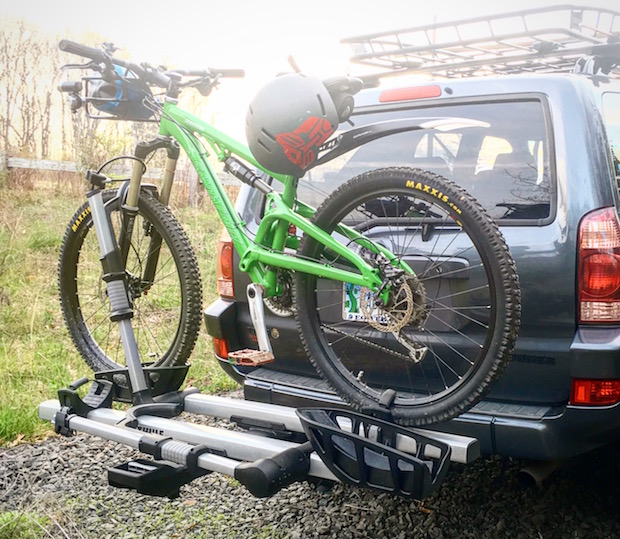
When specifically comparing the T2 Pro to the original T2, the latter has almost two more inches of clearance between the rack and the hatch, but the T2 Pro has almost four more inches of ground clearance. The focus here should be on the benefit of the added ground clearance as both models have a tilt down feature which reduces the severity of the rack to hatch clearance measurements. The ability to tilt the rack down with bikes loaded has been improved, overall – as the trigger handle is now mounted at the end of the rack instead of up near the back of your vehicle.
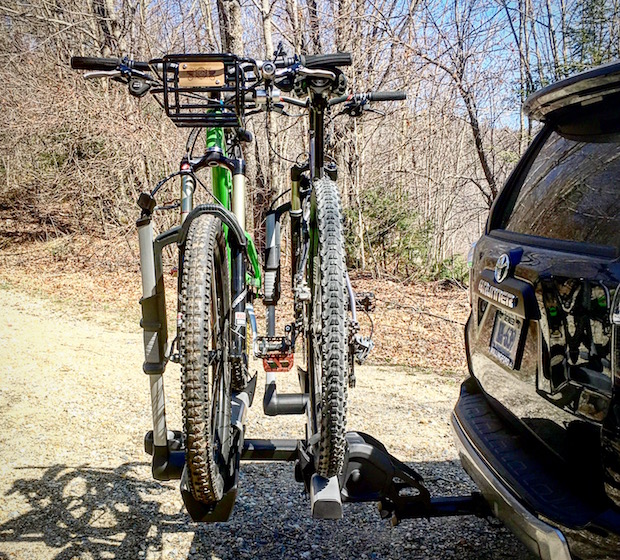
A third variable, which is more of a concern for vehicles like Jeep Wranglers with rear-mounted spare tires, is the clearance between the rack and the back of the vehicle when the T2 or T2 Pro are in their upright, stored positions. The T2 Pro, with its fixed bike trays and over-sized wheel holders sees a gain of almost three inches of clearance over the original T2 when stored upright. This is fairly significant seeing that there is an impressive amount of Wrangler owners who use Thule T2’s. They’ve been fairly vocal over the years about this issue so these folks are probably doing backflips right now knowing this, and rightfully so.
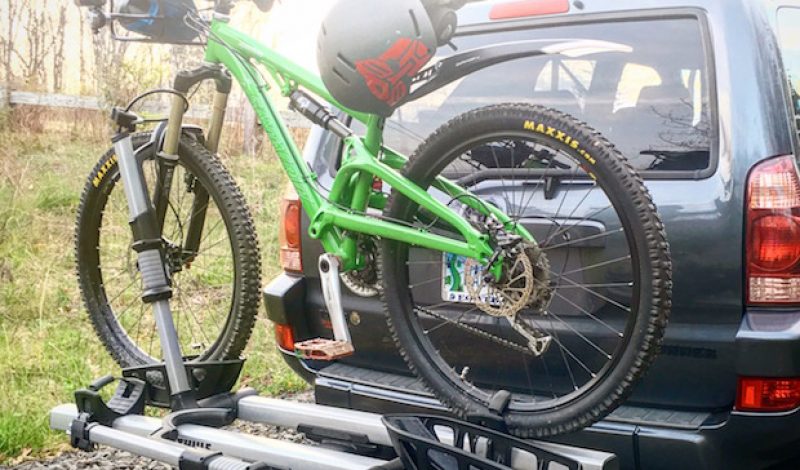
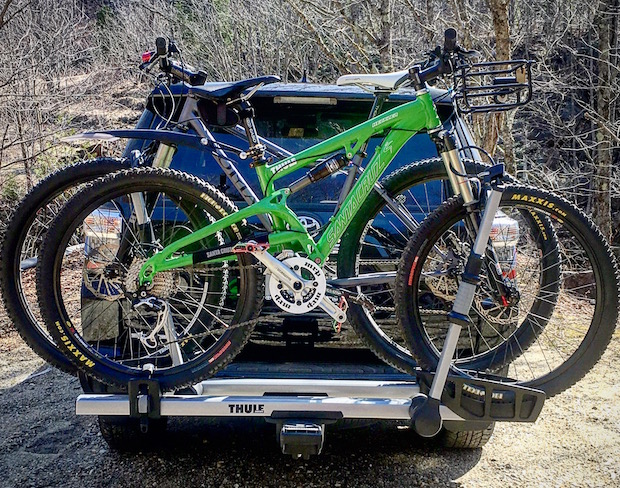
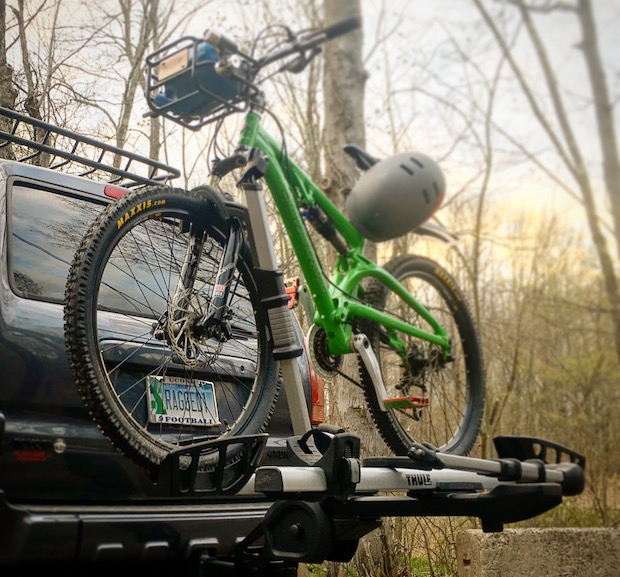
Nevertheless, there is a trade-off here – and it goes back to the ground clearance dimension. With the increased ground clearance of the T2 Pro, everything will sit higher on the back of your vehicle than it will with the original T2. On my Toyota 4Runner, this puts the meat of my Santa Cruz Heckler right in the center of my field of view and also completely blocks my license plate. I’m not going to get too jammed up about this as I tend to drive with my side mirrors more than my rear view, but certain states are cracking down on folks blocking their license plates. Just keep that in mind as it’s not something you’ll notice until you get home and go to use it for the first time.
THE 2-BIKE ADD-ON
I didn’t include the 9036 2-Bike Add-On in the scope of this test because a majority of us probably won’t use it unless we’re driving the support car for some stellar mountain bike race. But it is worth mentioning that it’s just as easy to bolt on as the extension for the original T2: you remove a couple of bolts, insert the extension, and tighten the bolts back up. The decision to move the trigger handle to the end of the rack really shines here as it’s easier to access than on the original T2. Surprisingly, however, the new 2-Bike add-on doesn’t lock to the base carrier, which is something that people have been asking Thule to incorporate for years.
THE BOTTOMLINE
It’s obvious that Thule did their homework and listened to their customers when it came down to designing the T2 Pro. It pays homage to the original T2 enough so that it could be considered an upgrade, but not enough to eliminate the need for the original in the marketplace. The T2 Pro is a more universal rack that can carry more types of bikes, has better vehicle clearance, and cuts down on the assembly and install times. I think it’s safe to say that both Thule and their customer base were satisfied with how the original T2 secured and carried bikes, so there was no need to change the way the bikes were held in place. All of this makes the T2 Pro is a premium rack system that offers all of the creature comforts that weren’t present in the original T2 or T2 Classic.
That being said, if you’re a current original T2 owner I’m not so sure that it’s necessary for you to go out and upgrade to the T2 Pro. At this point, you’ve already assembled the rack and are accustomed to using a socket wrench or the included Thule Wrench / Bottle opener to tighten it to your receiver hitch. So, you’ve overcome the two biggest grumbles against the original. Even if you were planning on getting a fat bike, you could just shell out the $49.95 for the 919 Fat Tire Kit. The only folks who currently own an original T2 that I would recommend the upgrade to the Pro are the Jeep Wrangler owners of the world. You’ve struggled long enough with clearance issues and having to drive around with your stock 31” tires. Your day has come – go out and grab a T2 Pro, order up those 33” Mickey Thompson Mudders, and seize the day! I don’t even own a Jeep Wrangler and I’m excited about that. Kudos to you.
For those folks who don’t own the original T2, a Jeep Wrangler, or a fat bike and are now faced with having to choose between the T2 Classic and the T2 Pro your choice is going to be a little more personal. Your decision should heavily rely on how much you plan on using the rack, if you plan on taking the rack off and on quite a bit, and – honestly – how long you plan on keeping your current vehicle or even your current bike. In my mind, after years of selling Thule and Yakima products to folks, I always recommend the more universal and easier to use rack system. Though the T2 Pro costs $150 more at the retail level than the T2 Classic, it may be worth considering that investment for the long haul. We are a society of people who have become accustomed to ease of use, and the T2 Pro excels in that category. But the bottom line is that both of these racks will carry your bikes safely and securely for years to come as they’re both built to last.
T2 PRO UPGRADE RECAP
Minimal Assembly Required
Tool-free Install
Increased Ground Clearance
Increased Spare Tire Clearance for Jeep Wranglers and the like
Fits Fat Bikes Out of the Box
Folding and Tilting down the rack is made easier by new trigger handle position
OTHER NOTABLE UPGRADES IN THE T2 PRO
Bye, Bye Foam:
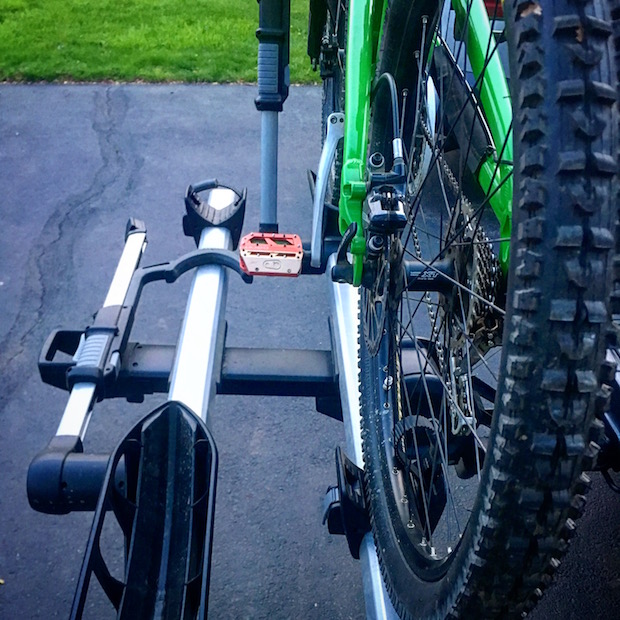
The original T2 used a foam wrapped hook over the front wheel. Though the foam was durable, it could tear and break away over time which would compromise how well it held to your tire. With the T2 Pro, Thule went with a durable TPE over-molded insert on the hook which will outlast both your bike and car.
Hello Foam:
The tubular bike trays on the T2 Pro actually have foam inserts inside which not only increase the rigidity of the tube while reducing the overall weight of the rack, but help to keep water – and eventually rust – out from a place you may never see it, until the rack rots out.
Fewer Locks:
Thule eliminated the locks on the housing of the ratcheting arm, reducing the overall number of locks needed to fully secure the T2 Pro from 5 to 3.
PRODUCT INFO
Thule 9034 T2 Pro 2” $549.95
Thule 9036 T2 Pro 2” Add-On $399.95 Fits 2” Receiver Hitches Only
Thule 9035 T2 Pro 1 ¼” $549.95
Thule 9044 T2 Classic 2” $399.95
Thule 9046 T2 Classic 2” Add-On $299.95 Fits 2” Receiver Hitches Only
Thule 9045 T2 Classic 1 ¼” $399.95
Thule 919 Fat Tire Kit $49.95